Also note the oak facing piece on the front of the slide log. It is just epoxyed in place, with a piece of quarter round stock for reinforcement.


| Chebacco Hatch Details | |||
| A prospective builder wrote to request close ups of the main hatch. Here they are for everyone... | |||
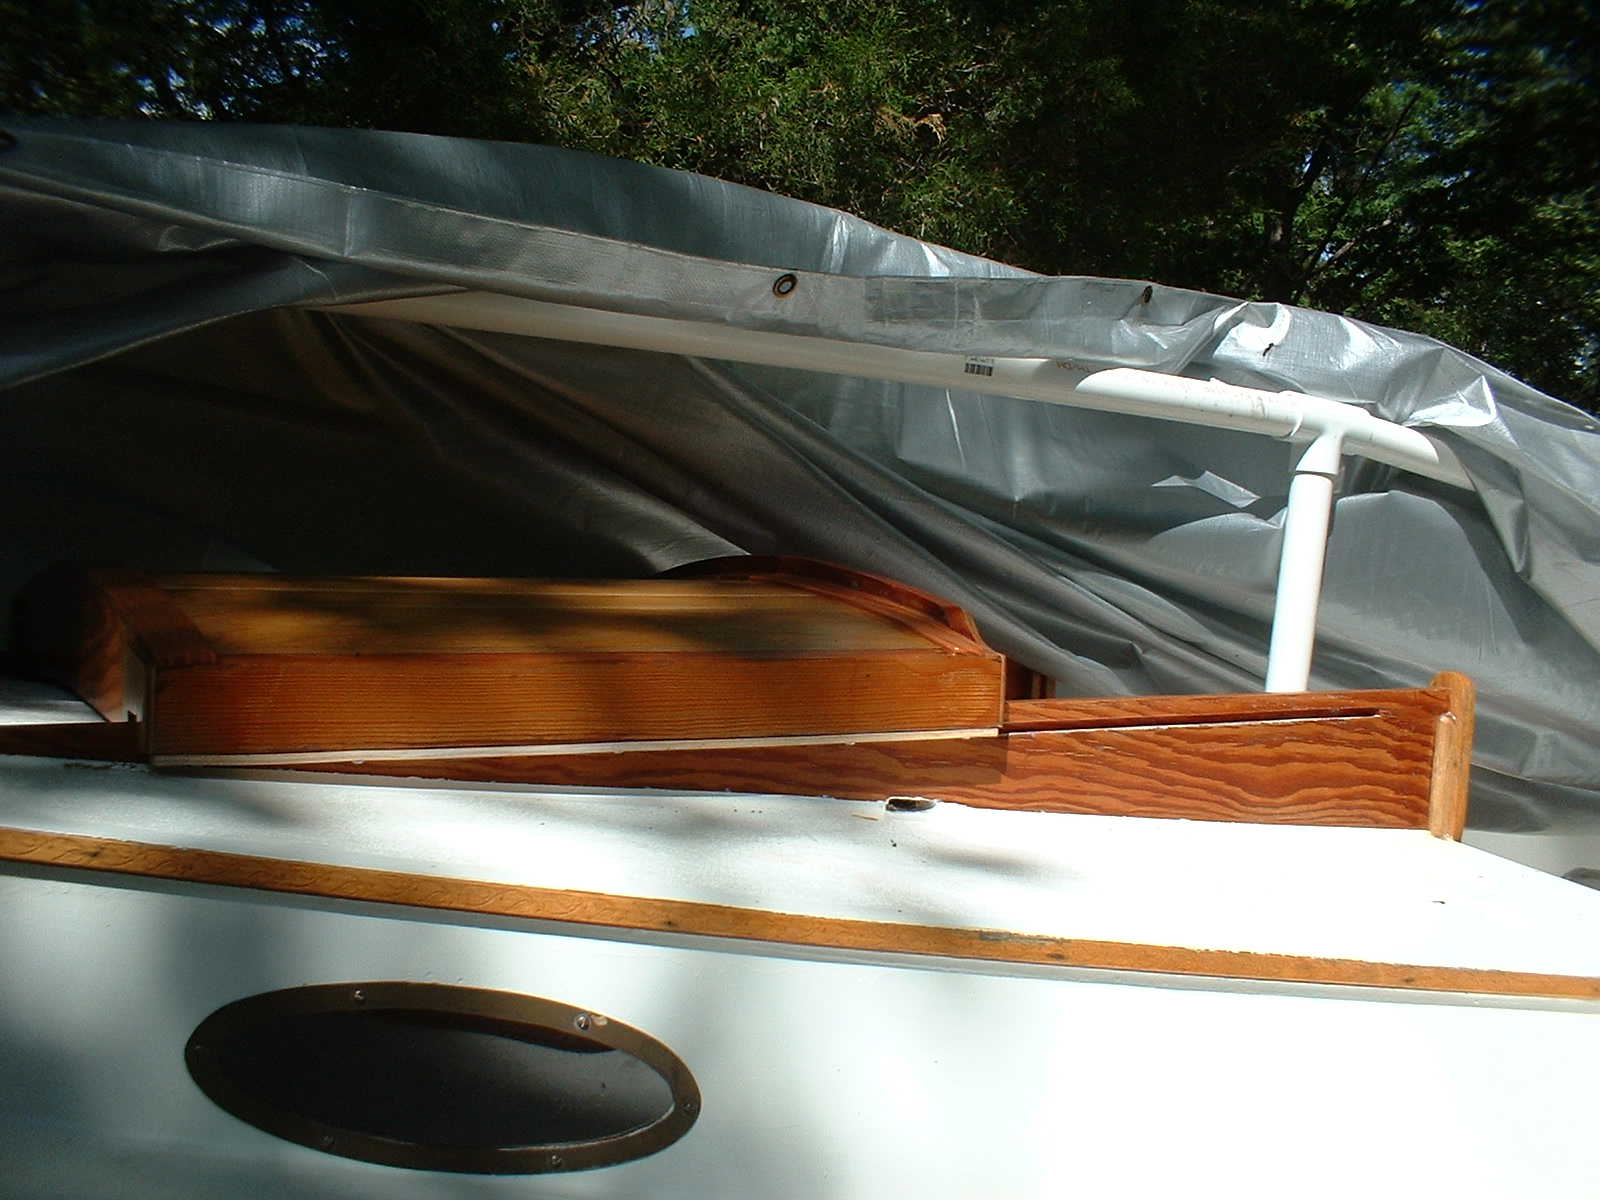
| This is a side view of the open hatch sitting on the slide logs (hatch coamings). |
|
||
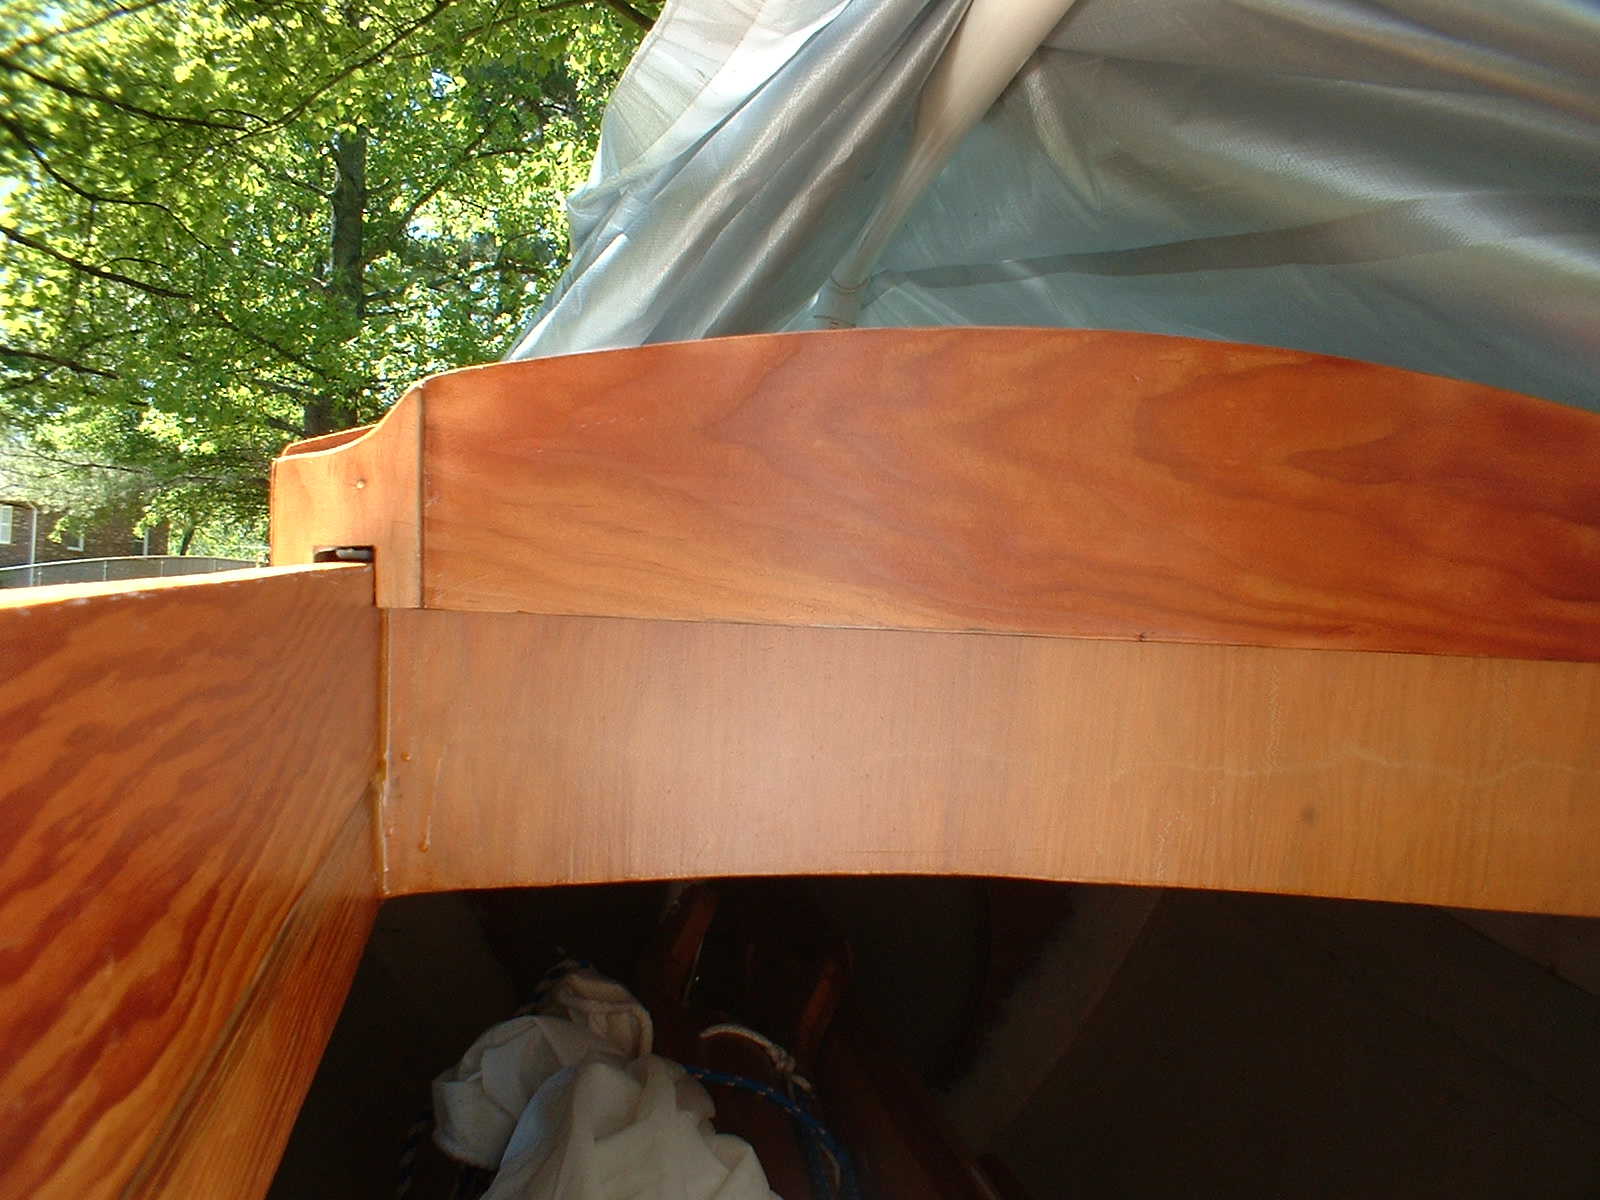
| Angled side view of the open hatch. Note the
1/4 inch rabbit in the slide log - this is part of the hatch hold down
system (see the close up below). To make the rabbit, get the slide logs cut
and installed, build the hatch to fit, then mark the location of the rabbit.
Cut the rabbit with a router set up to cut 1/4 inch deep when sliding the
router base along the top of the slide log. Don't mess this up :). Also note the oak facing piece on the front of the slide log. It is just epoxyed in place, with a piece of quarter round stock for reinforcement. |
|
||
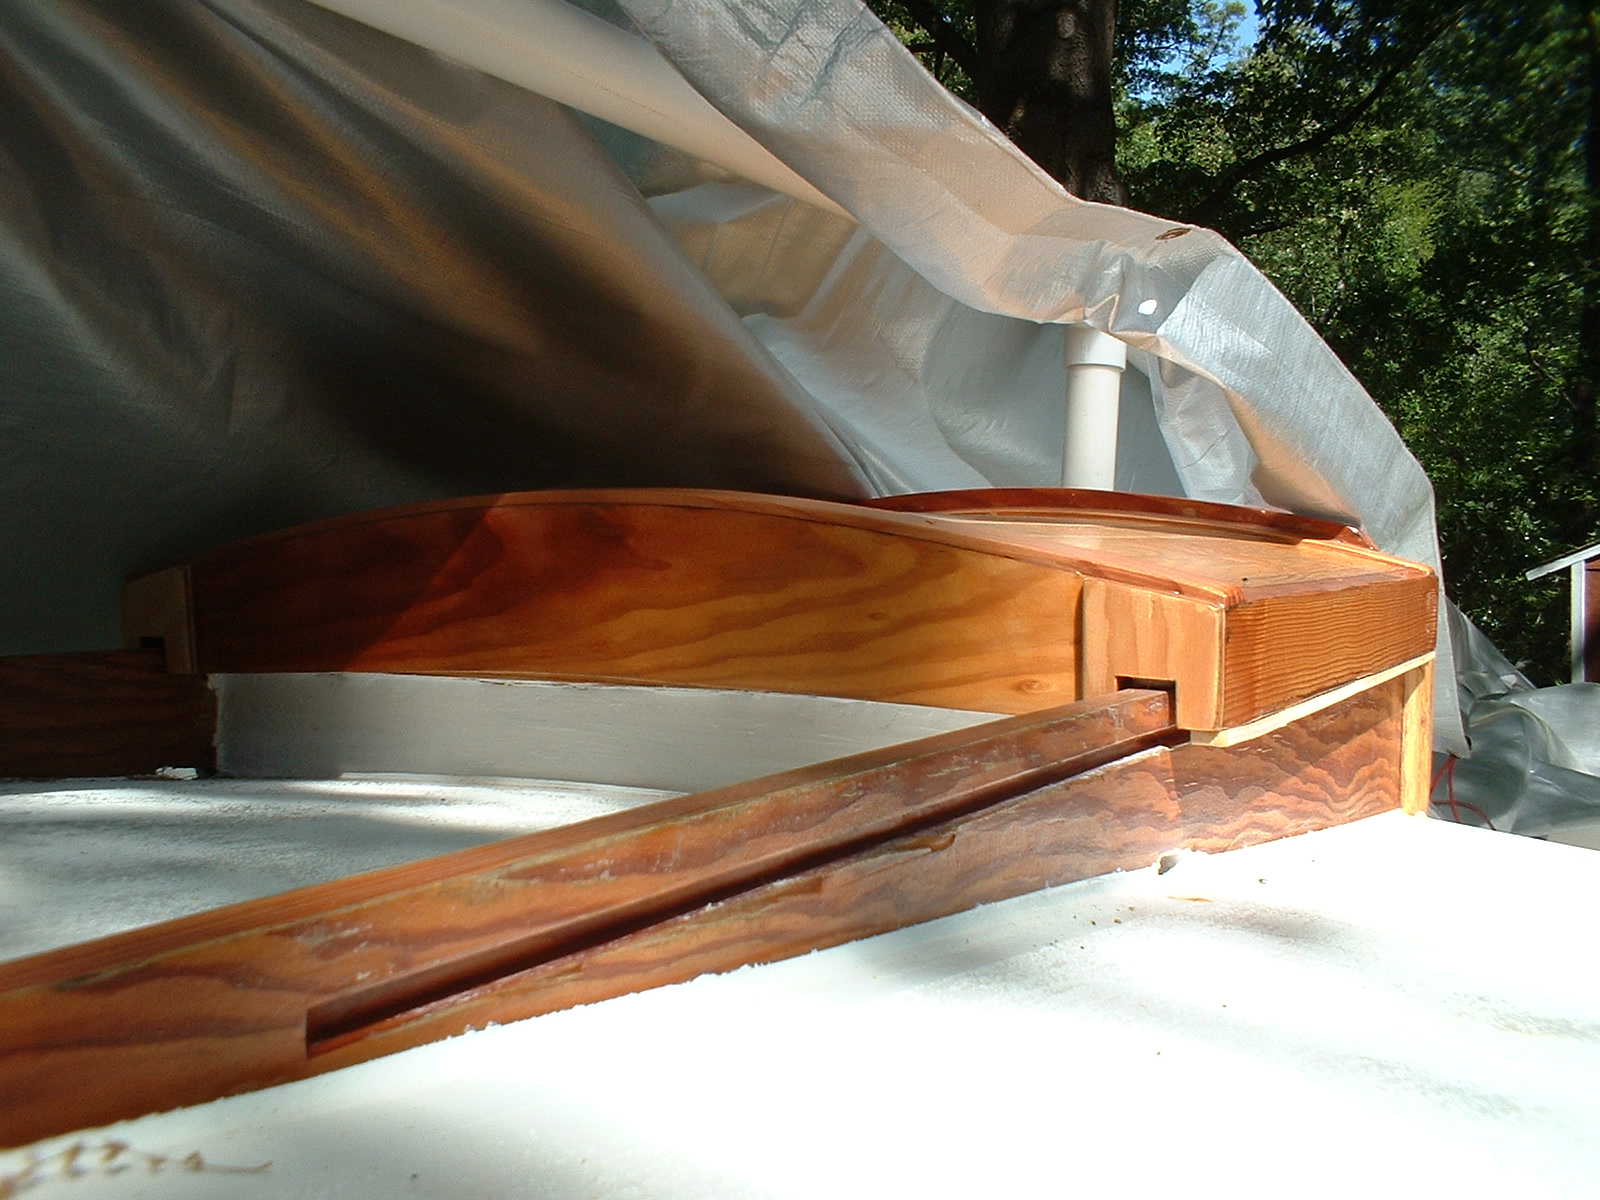
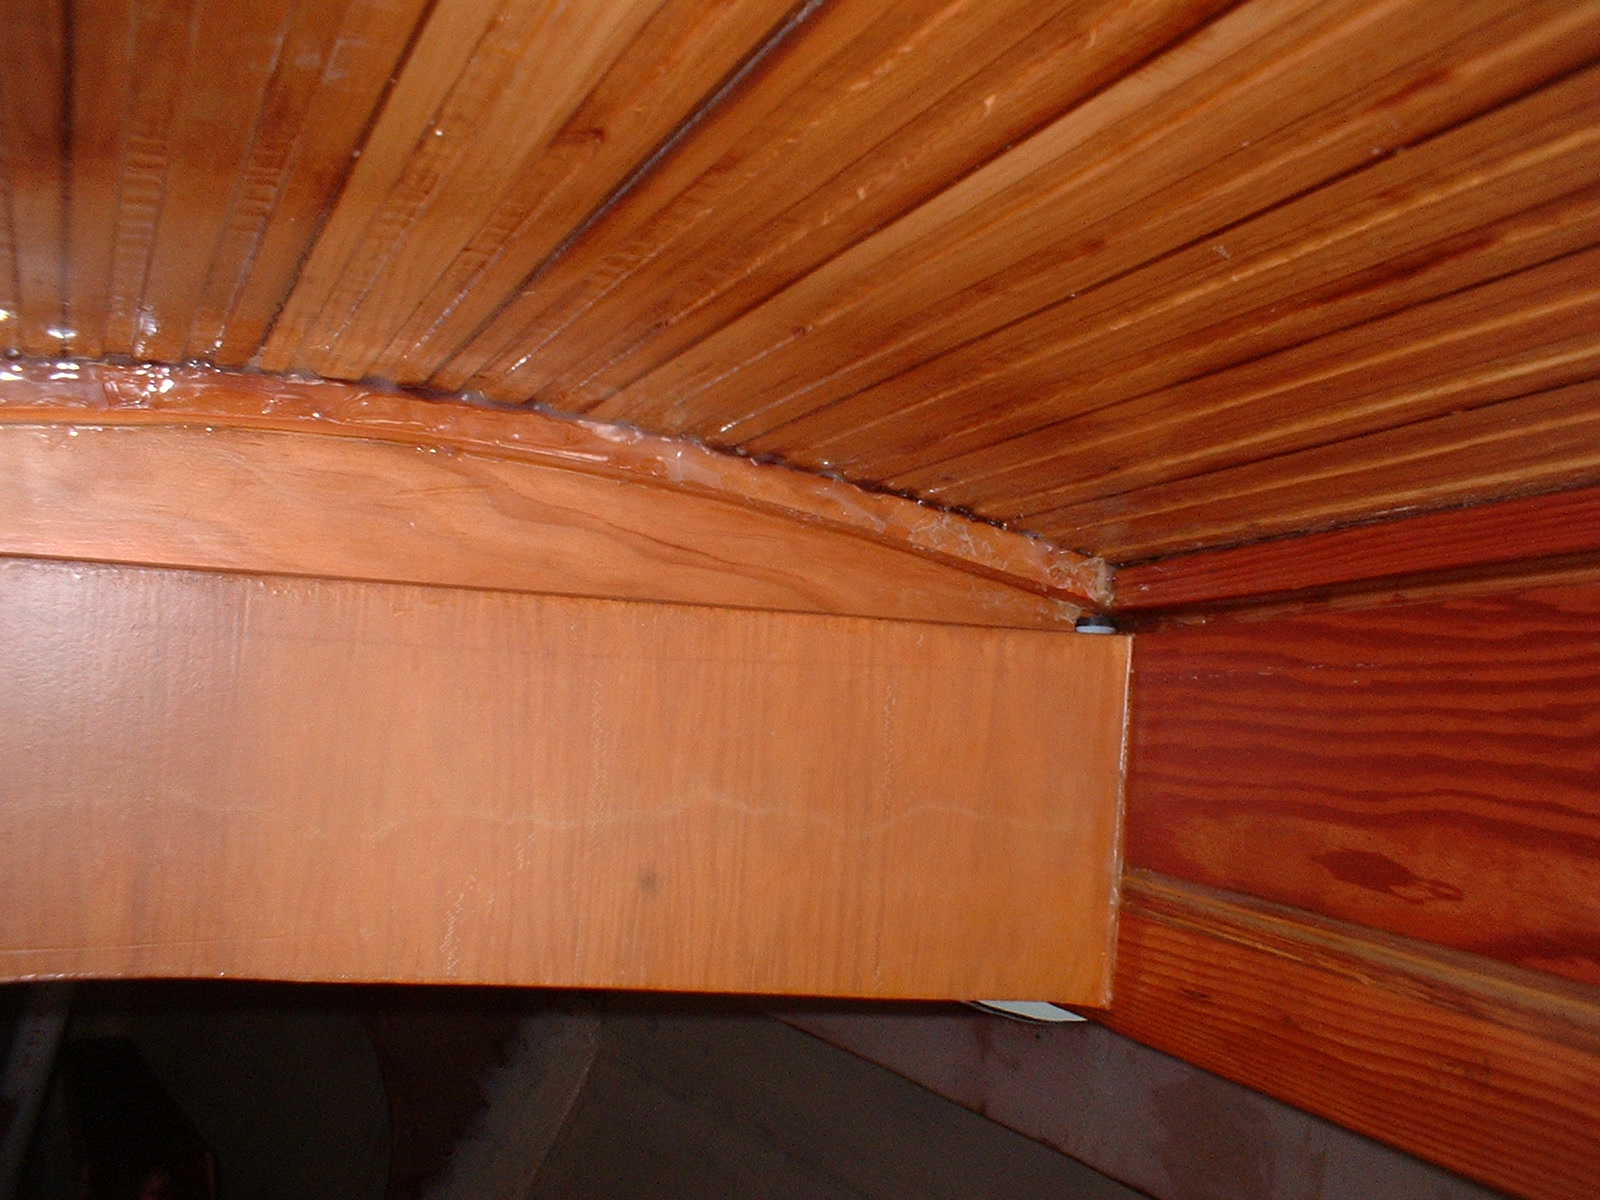
| Close up of the rabbit and hold down. Note the lighter colored strip on the bottom edge of the hatch. This is a 1/4 inch x 1 inch strip of plastic (fake wood trim from the home store). The hatch is placed on the slide logs, the hold down strip is slipped into the slot, and screwed into place from the bottom of the strip with SS screws. |
|
||
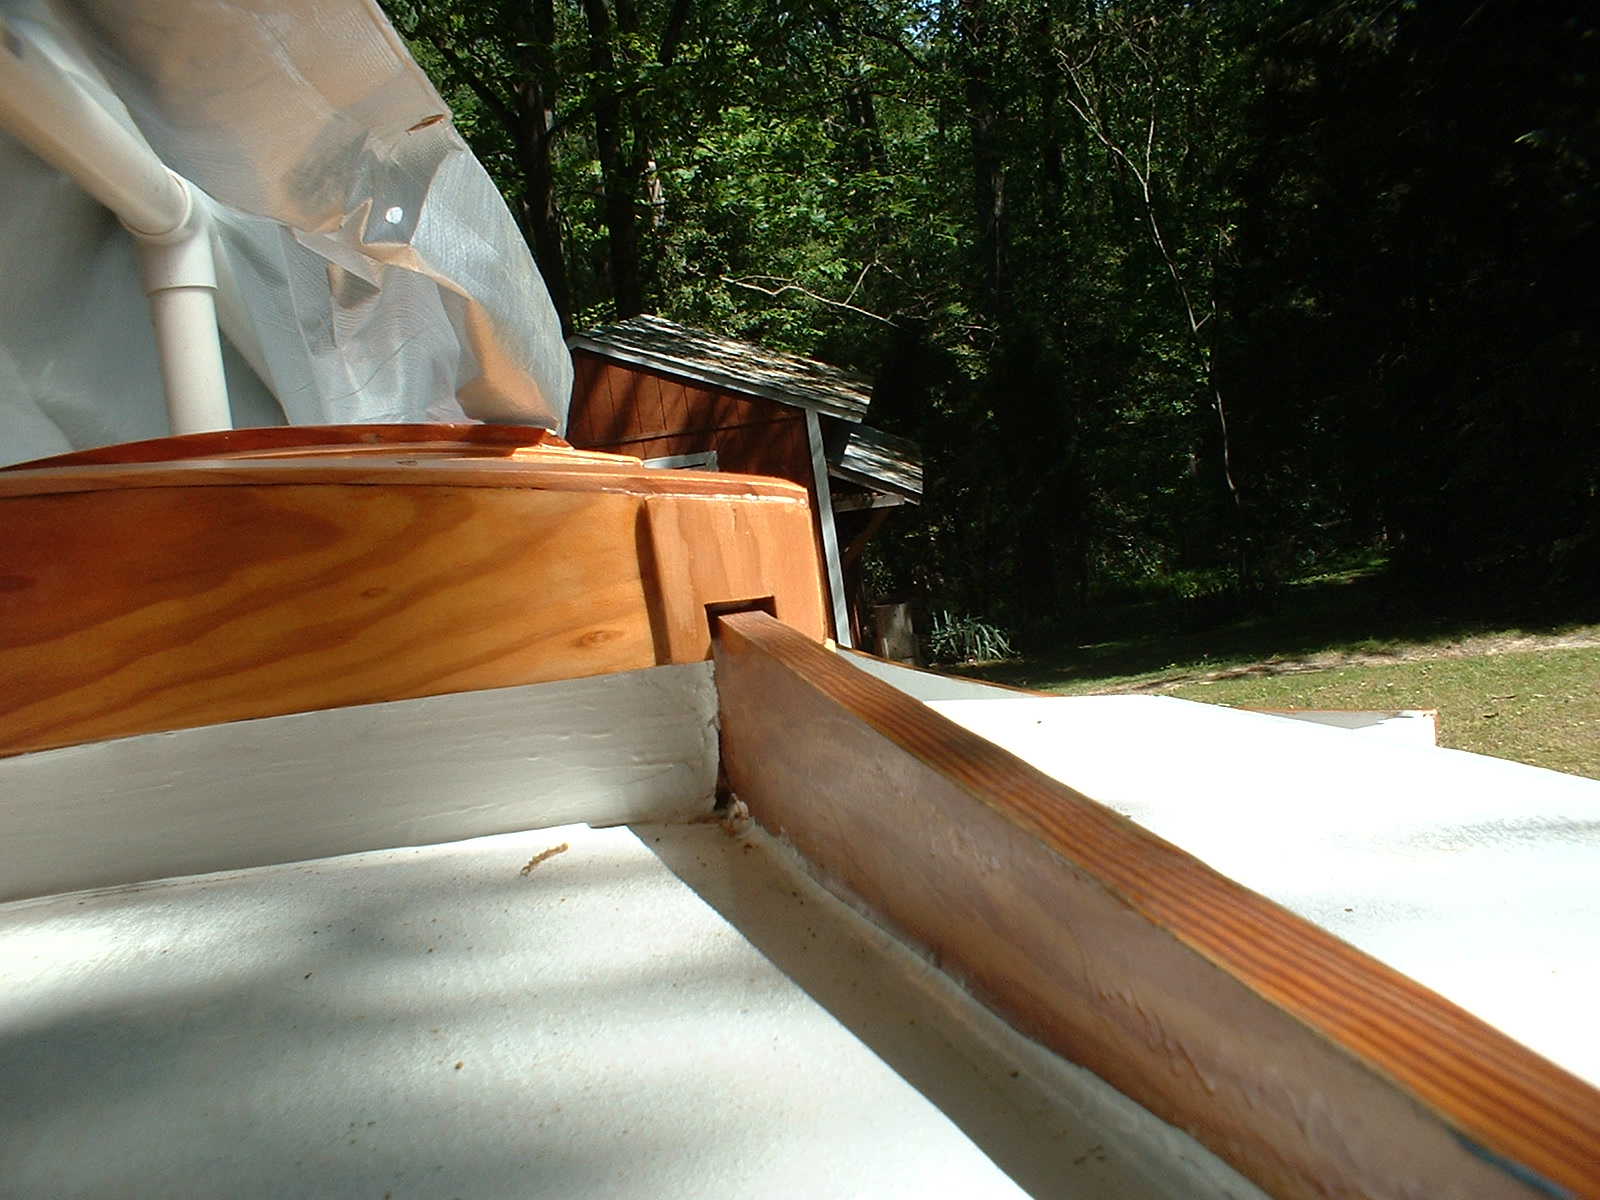
| Side view with the hatch closed. Be sure to allow space for the hatch to open all the way when cutting the slide logs. |
|
||
| View from the centerline, looking aft at the closed hatch. Note the white cross coaming - the top of the cross coaming comes up even with the top of the slide logs, which is higher that the bottom edge of the hatch. The overlap is needed to help keep water out and to act as a stop for the hatch to keep it from sliding too far forward or aft. Don't forget the scuppers in the slide logs just forward of the cross coaming. |
|
||
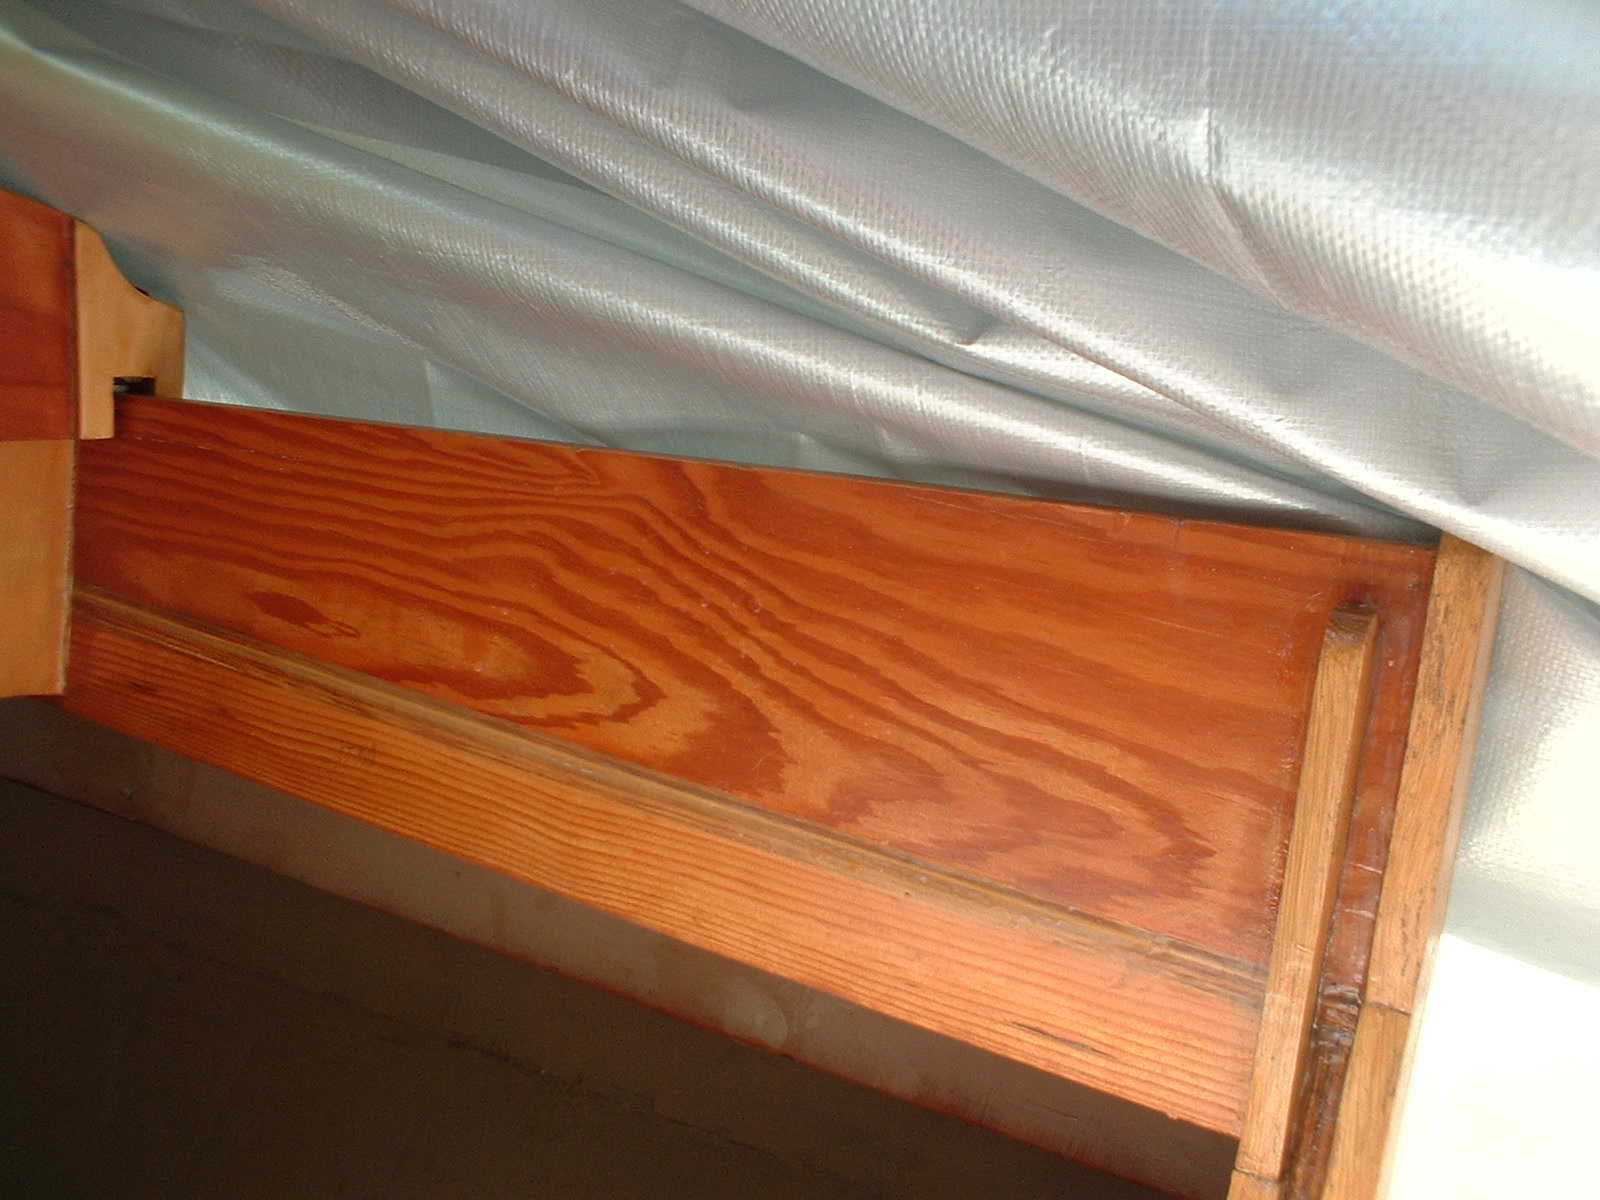
| Inside view of the slide logs in the companionway. Note that is is just butt glued to the deck. I was a little worried that it would not be study enough, but it has proven to be fine. It would look better if it had a facing that extended to the bottom of the roof beam, but it is really not necessary. |
|
||
| Another inside view of the slide logs and cross coaming with the hatch open. Note that the cross coaming and hatch front serves as a stop for the hatch. |
|
||
| Inside view with the hatch closed. Note the overlap of the hatch and cross coaming - about 3/4-inch. |
|
||
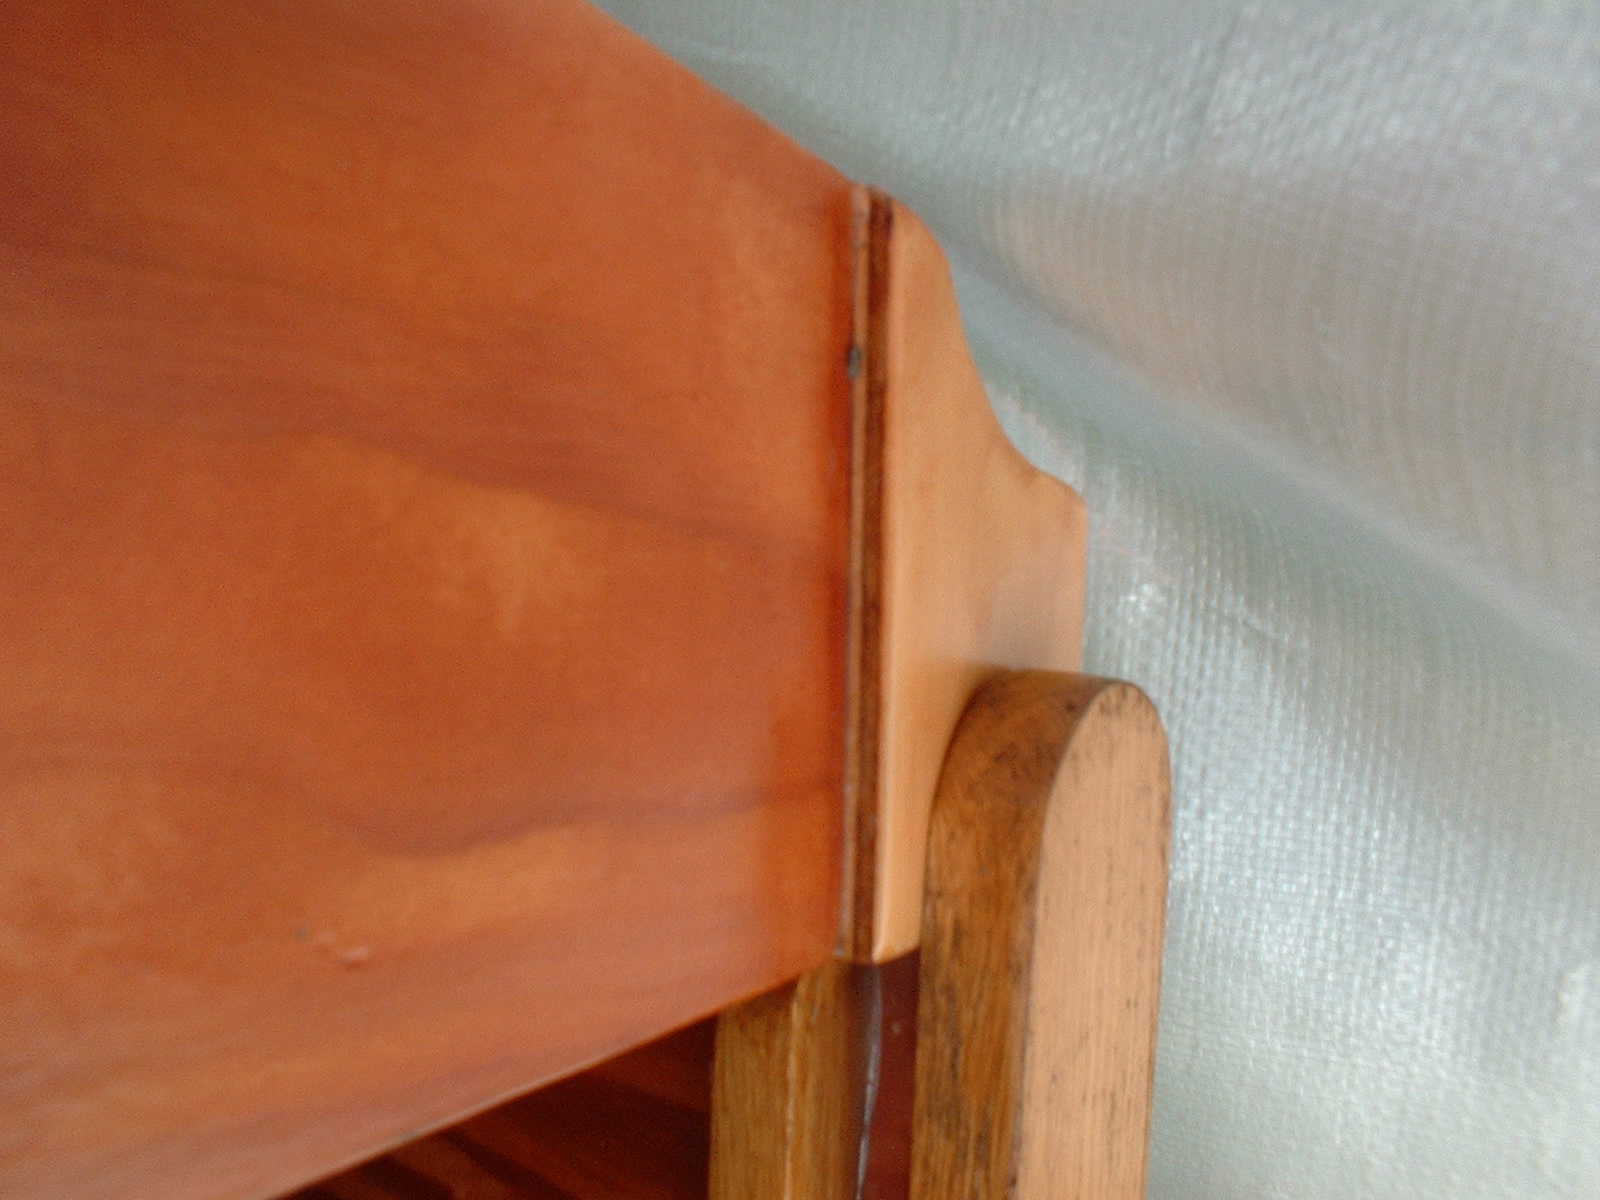
| Close up of the closed hatch and facing board. The facing board also serves as part of the slot to hold the hatch boards. Note that the hatch front lines up with the slot to cover the top of the hatch boards when closed. Also note the 1/4 inch ply corner reinforcement, something I added this year (spring 2007). The simple corner joints could not hold. Although the hatch was still plenty strong, the cracks that were opening up looked terrible and I assume would eventually fail. I'm hoping the reinforcements will hold, but if they do not I'll need to rebuild the hatches. Moral of the story: don't that short cuts with joinery for the hatches! |
|
||
| Go to Construction Page 1, 2, 3, 4, 5, 6, 7, 8, 9 | |||
| Home | |||