QSPro
uses a backplane called
Flexsim
to hook the
ModelSim
and
QuickSim
tools together to simulate designs which contain both VHDL components and regular Mentor Graphics (
Quicksim
) components. Within
QSPro
, you can use the
Quicksim
GUI to manipulate (trace, force, etc.) signals in the
Quicksim
portion of the design, and the
ModelSim
GUI to manipulate signals in the VHDL portion of the design. However, you can also use the
Quicksim
GUI to manipulate signals in the VHDL portion of the design as well, so it is easiest to simply do it there.
4.2 Make the
Quicksim
window active by clicking on its top edge, and open the schematic sheet. Use the
menu item to select all of the nets in the design and use the
item to trace the signals. Use the
menu item to unselect the signals.
4.3 To simply illustrate how signals can also be traced in the
QHSim
GUI, use the
menu item to bring the
menu to the top menu bar of the
Quicksim window.
Next use the menu item and
draw a
box ONLY around the and2 component so that its pins are selected. Then use the
menu time to bring up the
Add HDL Waves
dialog box. Make sure that the
Selected Objects
button is selected and click
. Notice how a
ModelSim
wave window appears with the
/aoi_qsim/and2/a,
/aoi_qsim/and2/b
, and
/aoi_qsim/and2/c
signals (the inputs and output of the
and2
VHDL component) in it.
4.3 Unselect all of the pins in the schematic and select the
A
input and force the following values on it: 0 at 0 ns, 1 at 160 ns, and 0 at 200 ns. Force the
B
input to 0 at 0 ns, and 1 at 160 ns. Force the
C
input to 0 at 0 ns, 1 at 80 ns, and 0 at 100 ns. Run the simulation for 240 ns. The result should be a display like the one below (with the
ModelSim
Wave window on top).


 button to bring up the
Add Instance | Choose Symbol
dialog box and select the
and2
symbol. Add an
or2
and
inv
component from the
gen_lib
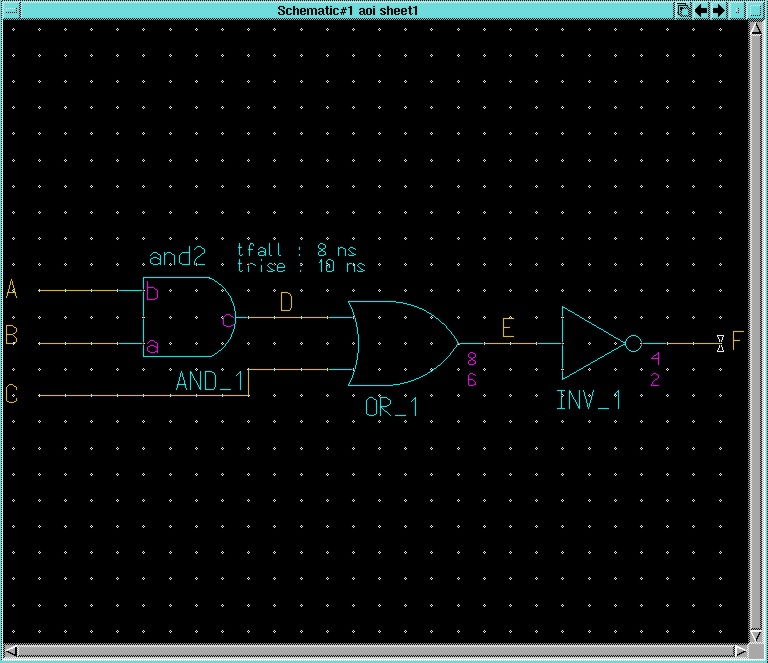
library and construct a schematic like the one below. Don't forget to modify the rise and fall properties on the
or2
and
inv
components, add INST properties to these two components, and name all of the nets.

